Bonsai Image 4B: Local Ternary Image Generation on an M4 Pro
Bonsai Image 4B: Local Ternary Image Generation on an M4 Pro
This is a working tutorial for the local Bonsai Image setup in /Users/bryanconklin/Documents/bonsai.
The short version: PrismML's Bonsai Image 4B is a compact image-generation family built for local devices. The project here is already running with a FastAPI backend and a Next.js studio frontend. On an M4 Pro, the ternary MLX backend can generate good-looking images locally with 4 diffusion steps, no remote image API, and a workflow that feels close to a desktop creative tool.
This post is intentionally more practical than a model review. It shows the project layout, the commands, the high-quality local preview settings, the official PrismML claims, the measured local numbers, and where I would take the workflow next.
Useful source links:
- PrismML release: Introducing 1-bit and Ternary Bonsai Image 4B
- GitHub demo: PrismML-Eng/Bonsai-image-demo
- Hugging Face collection: prism-ml/bonsai-image
- WebGPU demo space: Bonsai Image WebGPU
- iOS app: Bonsai Studio by PrismML
What This Shows
The useful idea is not only that the images look good. It is that image generation can move closer to the device.
PrismML reports two Bonsai Image 4B variants:
- 1-bit Bonsai Image 4B: binary
{−1, +1}transformer weights with FP16 group-wise scaling, aimed at the smallest footprint. - Ternary Bonsai Image 4B:
{−1, 0, +1}transformer weights with FP16 group-wise scaling, aimed at better prompt fidelity while staying compact.
The local project defaults to the ternary path on macOS:
BONSAI_VARIANT=ternary
model: ternary-mlx
backend: bonsai-ternary-mlx
steps: 4
Reported by PrismML, the ternary transformer footprint is 1.21 GB, compared with 7.75 GB for the full-precision FLUX.2 Klein 4B transformer. Including the compressed text encoder and FP16 VAE, PrismML lists the Apple Silicon deployment payload at 3.88 GB for the ternary variant.
That is the architecture story: keep the diffusion transformer tiny enough that the image loop can run locally, then use MLX on Apple Silicon to make the experience practical.
Official PrismML Context
PrismML frames Bonsai Image 4B as a local image-generation release for laptops, phones, and other devices that usually cannot run a modern 4B-class image model comfortably.
The official release says Bonsai Image 4B is built from FLUX.2 Klein 4B and keeps the architecture intact while changing how the diffusion-transformer weights are represented. The transformer is the repeated part of the diffusion loop, so shrinking that component changes the runtime envelope more than shrinking some rarely used side module.
From the release:
| Model | Diffusion Transformer | Reduction vs FP16 |
|---|---|---|
| FLUX.2 Klein 4B | 7.75 GB | 1.0x |
| 1-bit Bonsai Image 4B | 0.93 GB | 8.3x |
| Ternary Bonsai Image 4B | 1.21 GB | 6.4x |
PrismML also reports this benchmark comparison:
| Model | Transformer Footprint | GenEval | HPSv3 | DPG-Bench | Performance vs FLUX.2 Klein 4B |
|---|---|---|---|---|---|
| 1-bit Bonsai Image 4B | 0.93 GB | 0.671 | 11.15 | 0.822 | 88% |
| Ternary Bonsai Image 4B | 1.21 GB | 0.723 | 12.22 | 0.851 | 95% |
| FLUX.2 Klein 4B | 7.75 GB | 0.819 | 12.84 | 0.853 | 100% |
| PixArt-Σ XL 2 | 1.2 GB | 0.541 | 11.93 | 0.769 | 83% |
Those are reported claims from PrismML, not my independent benchmark run. The useful takeaway for this tutorial is narrower: the ternary variant is the quality-oriented local path, and the compression is large enough that the model can sit in a local creative loop instead of being treated like a remote service.
PrismML's page includes official generated-image grids and comparisons. I am linking them rather than rehosting every official image here:
- Official generated image grid
- Official qualitative comparison grid
- Official Bonsai Image release page
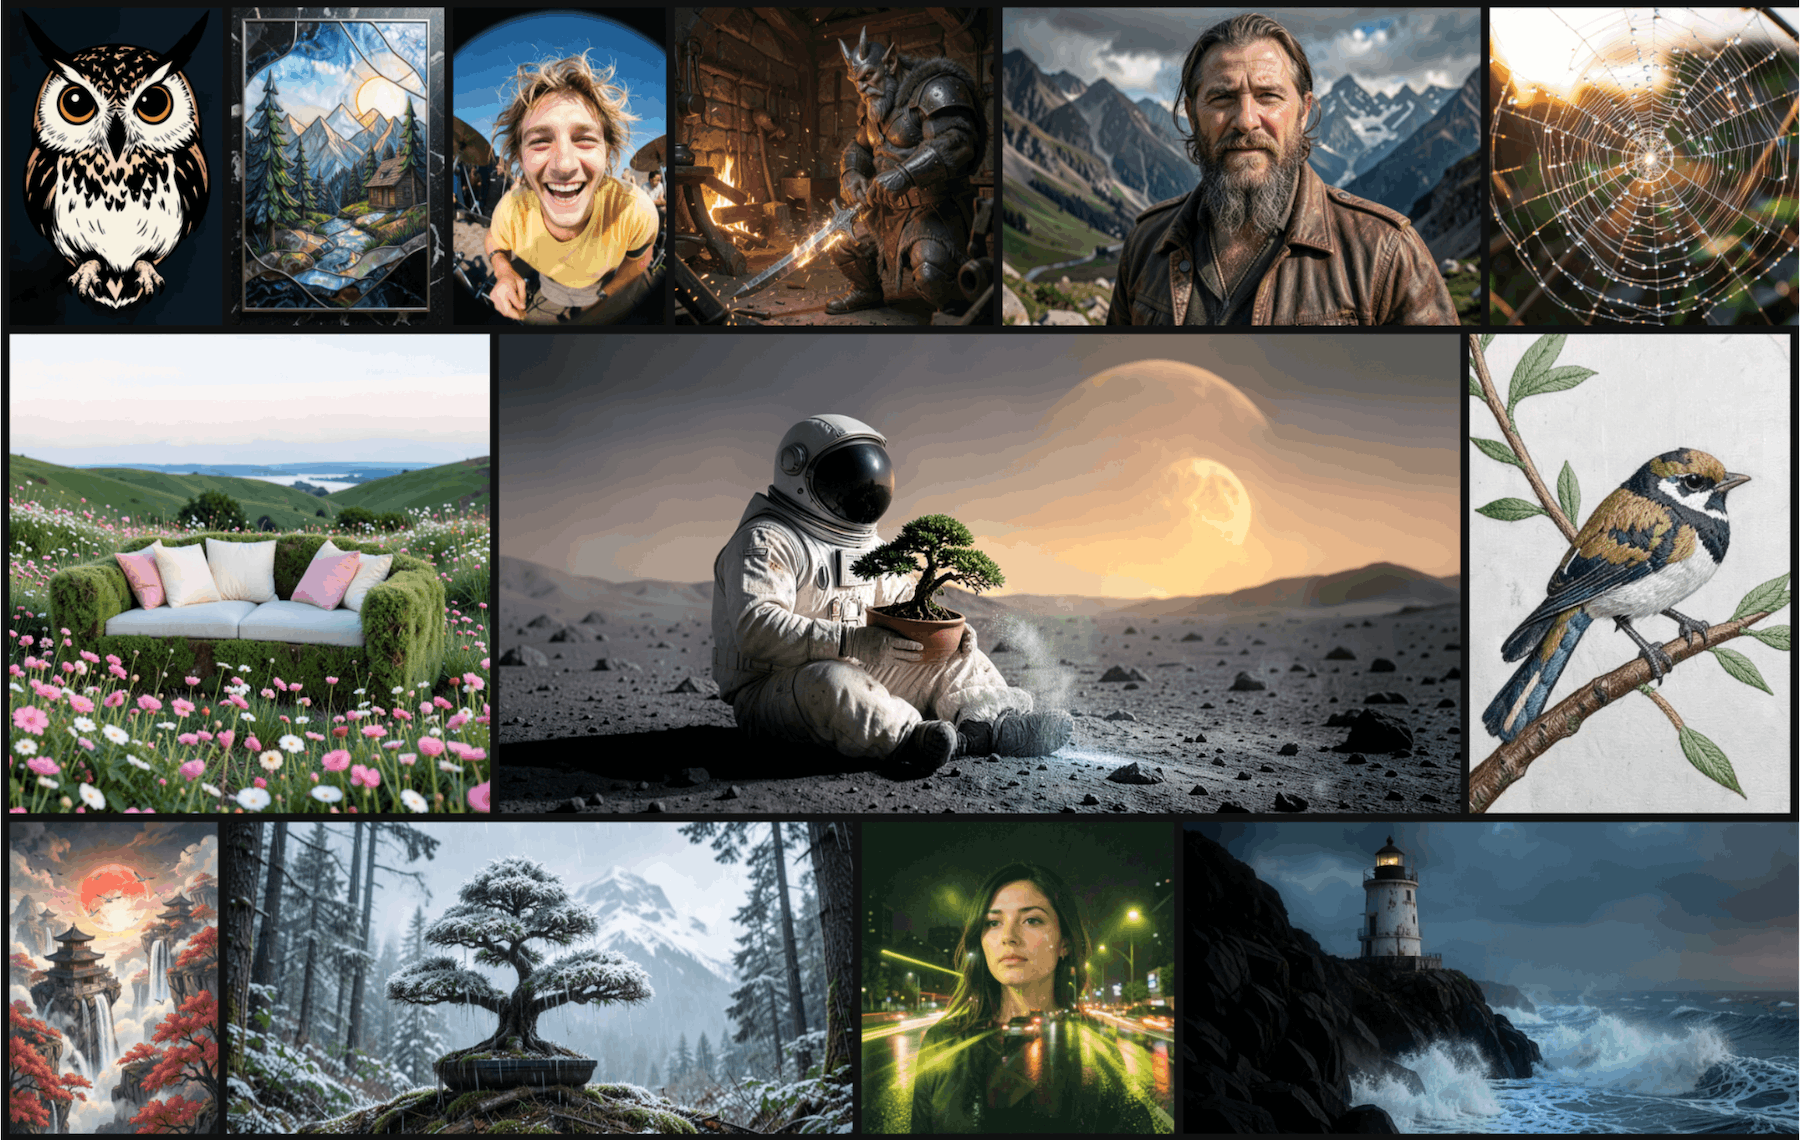
Official generated-image grid from PrismML's Bonsai Image 4B release.
.png)
Official qualitative comparison grid from PrismML's release post.
Local Project Shape
The project is in:
/Users/bryanconklin/Documents/bonsai
The important pieces:
README.md
scripts/serve.sh
scripts/generate.sh
scripts/send_request.sh
scripts/generate.py
scripts/local_backend_mac.py
models/
outputs/
vendor/image-studio/
The full studio path is the one to use most of the time. It keeps the backend warm and gives you the browser UI:
cd /Users/bryanconklin/Documents/bonsai
./scripts/serve.sh
That starts:
- FastAPI backend on
http://127.0.0.1:8000 - Next.js frontend on
http://localhost:3000
The local backend shim exposes only the Bonsai variants, so the picker does not accidentally route into a much larger non-Bonsai model.
That detail matters. The macOS backend shim in scripts/local_backend_mac.py replaces the upstream /backends response so the UI advertises only:
bonsai-ternary
bonsai-binary
Without that guard, the upstream studio can expose non-Bonsai model families and trigger much larger downloads. For this tutorial, the point is specifically the local Bonsai workflow.
Generate From the Browser
Open:
http://localhost:3000
Use these settings for a fast quality pass:
- Model: Bonsai Ternary
- Steps:
4 - Seed: fixed seed while comparing prompts
- Resolution: use
512x512for fast prompt search, then move to1248x832or1408x704for publishable previews - Mode: Single first, batch only after the prompt works
The frontend stores recent renders in browser IndexedDB session history. If you want permanent files, use the download button or generate through the CLI/API into outputs/.
For a blog post, I would not stop at the quick 512 preview. Use 512 to find the prompt, then generate the final samples at a larger aspect ratio. The three samples below use 1248x832, 4 steps, and the ternary MLX backend.
Generate From the CLI
For a one-shot run:
cd /Users/bryanconklin/Documents/bonsai

./scripts/generate.sh \
  --prompt "photorealistic miniature bonsai tree on a rustic wooden windowsill at dusk during a gentle thunderstorm, dramatic moody lighting, rain droplets on leaves, highly detailed, cinematic" \
  --size 512x512 \
  --steps 4 \
  --seed 42 \
  --output outputs/bonsai_experiment_001.png
For repeated work, prefer the server path. The README notes that a long-lived backend avoids repeated cold-start overhead.
./scripts/serve.sh

./scripts/send_request.sh \
  -p "a glass terrarium city at night, miniature streets, glowing storefronts, moss and rain droplets on glass, cinematic macro photography" \
  --size 1248x832 \
  --seed 2026
You can also post directly to the running backend:
curl -s -o outputs/blog-samples/glass-terrarium-city.png \
  -H "Content-Type: application/json" \
  -d '{
    "prompt": "a glass terrarium city at night, miniature streets, glowing storefronts, moss and rain droplets on glass, cinematic macro photography",
    "backend": "bonsai-ternary-mlx",
    "seed": 2026,
    "steps": 4,
    "width": 1248,
    "height": 832
  }' \
  http://127.0.0.1:8000/generate
Three Local Preview Images
These were generated from the local Bonsai setup using the ternary MLX backend and 4 diffusion steps at 1248x832.
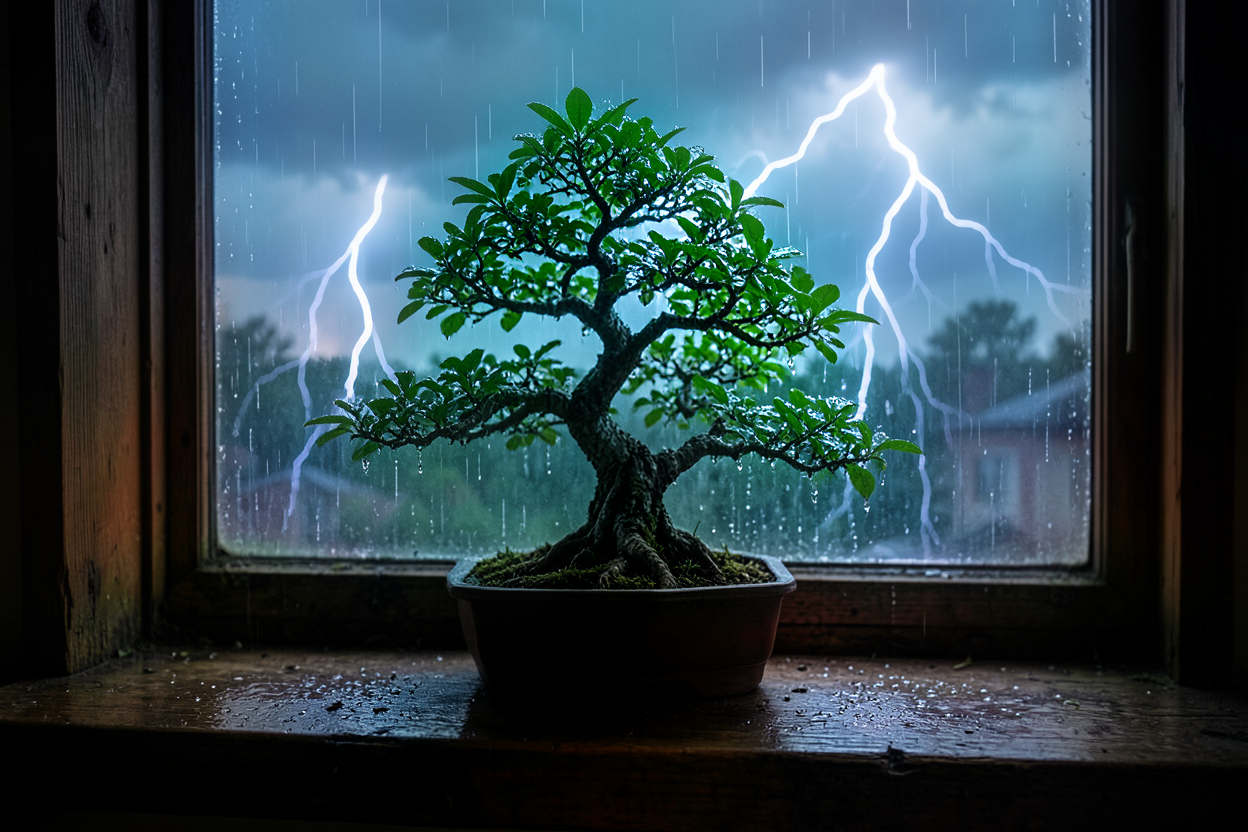
Prompt
photorealistic miniature bonsai tree on a rustic wooden windowsill at dusk during a gentle thunderstorm, dramatic moody lighting, rain droplets on leaves, highly detailed, cinematic
Settings
backend: bonsai-ternary-mlx
size: 1248x832
steps: 4
seed: 42
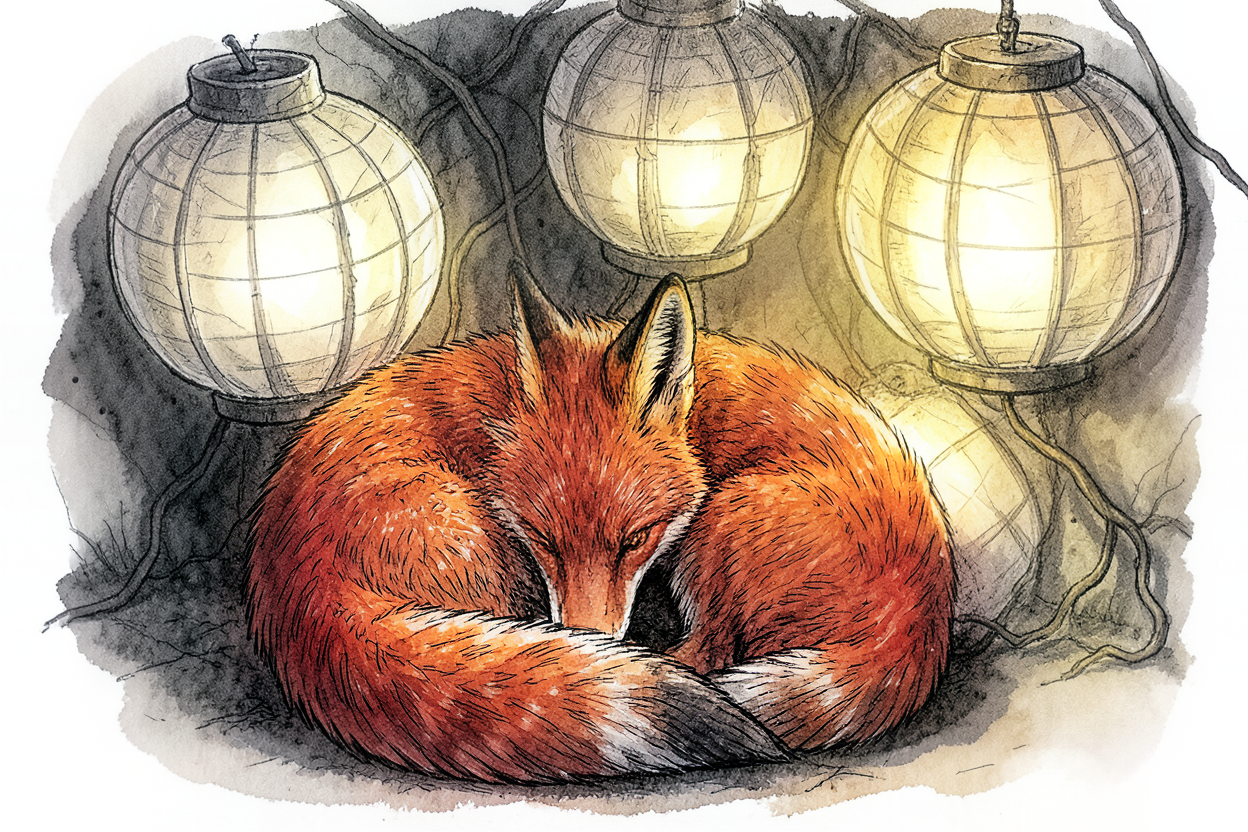
Prompt
a red fox curled beneath paper lanterns, ink wash style, gentle shadows, warm light, detailed fur, quiet storybook mood
Settings
backend: bonsai-ternary-mlx
size: 1248x832
steps: 4
seed: 1234
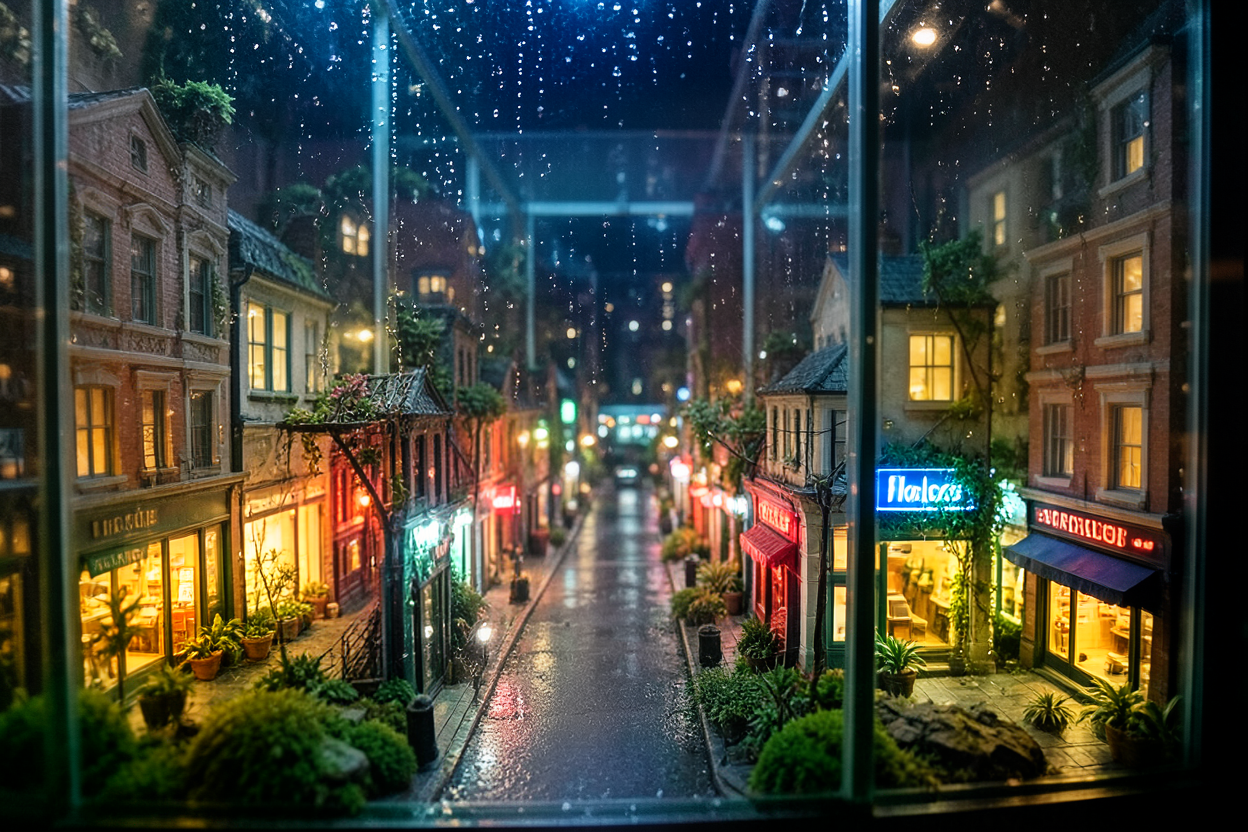
Prompt
a glass terrarium city at night, miniature streets, glowing storefronts, moss and rain droplets on glass, cinematic macro photography
Settings
backend: bonsai-ternary-mlx
size: 1248x832
steps: 4
seed: 2026
What I Measured Locally
The CLI metadata in this project shows a 512x512 ternary MLX run completing in about 9.7 seconds wall time after setup, with 4 diffusion steps:
model: ternary-mlx
size: 512x512
steps: 4
wall: 9.69s
setup: 1.52s
diffusion: 8.16s
The larger previews above were generated at 1248x832 with 4 steps. On this M4 Pro run, the local backend reported:
| Sample | Size | Steps | Wall Time | Peak Memory Header |
|---|---|---|---|---|
| Bonsai windowsill | 1248x832 | 4 | 27.67s | 6260.2 MiB |
| Paper lantern fox | 1248x832 | 4 | 27.41s | 6638.4 MiB |
| Terrarium city | 1248x832 | 4 | 27.58s | 6623.9 MiB |
That is the honest measurement from this run. The quick 512 path is what I would use for prompt search; the larger 1248x832 path is what I would use for images worth showing. Both are local, both are 4-step renders, and the larger path still feels practical for deliberate image creation.
The important part is the workflow: prompt, seed, render, revise, repeat, all locally.
Prompt Template
Use this pattern:
[subject], [setting], [lighting], [style or medium], [texture/detail], [camera or composition]
Examples:
a red fox curled beneath paper lanterns, ink wash style, gentle shadows, warm light, detailed fur, quiet storybook mood
a glass terrarium city at night, miniature streets, glowing storefronts, moss and rain droplets on glass, cinematic macro photography
photorealistic miniature bonsai tree on a rustic wooden windowsill at dusk during a gentle thunderstorm, dramatic moody lighting, rain droplets on leaves, highly detailed, cinematic
Keep the seed fixed while tuning the prompt. Change one part at a time. Once the prompt works, switch seeds or run a small batch.
A Better Local Workflow
This is the loop I would use:
- Start small. Generate at
512x512with 4 steps and a fixed seed. - Find the subject. Do not tune lighting, texture, and camera all at once. Get the core object right first.
- Add atmosphere. Add lighting, time of day, material, lens, or medium.
- Scale up. Move to
1248x832,1024x1024, or1408x704once the prompt is promising. - Save the metadata. Keep prompt, seed, model, size, steps, and output path together.
- Compare locally. Put the images in a small gallery so you can see how prompt changes behave.
For example:
subject: a glass terrarium city
setting: at night, miniature streets
lighting: glowing storefronts
texture: moss and rain droplets on glass
composition: cinematic macro photography
That prompt has enough structure for the model to make a coherent scene without becoming a bag of style words.
What To Build Next
The demo is already useful, but the architecture suggests a better tool:
- a persistent prompt library
- saved seeds and image metadata
- side-by-side comparisons
- a gallery page served from
outputs/ - one-click promotion from "experiment" to "blog asset"
- optional browser-side generation when WebGPU support catches up
The interesting direction is not just local image generation. It is local creative infrastructure: the model, the UI, the prompt history, the outputs, and the publishing workflow all on the same machine.
Troubleshooting
If the UI is up but generation fails:
tail -f .serve-logs/backend.log
tail -f .serve-logs/frontend.log
Check the backend list:
curl http://127.0.0.1:8000/backends
If you are on Apple Silicon, the macOS backend should expose the Bonsai MLX variants. If the frontend tries to reach a larger upstream model, check scripts/local_backend_mac.py; this project intentionally strips the default /backends route and returns only the Bonsai options.
If you are testing on M5 hardware, read docs/m5-metal.md. The project documents an M5 Metal compiler issue and the automatic workaround used by setup.
Why This Matters
Bonsai Image 4B is a strong example of the local utility direction. The model is not interesting only because it can make good pictures. It is interesting because the whole loop can live on the machine: prompt, render, inspect, revise, and keep the artifacts local.
That is the same pattern I want for browser and desktop AI more broadly. Small, efficient models become more useful when they can sit directly inside the tool, close to the work, with enough speed that iteration feels natural.
The next step is to turn this into a repeatable local creative workflow: prompt library, saved seeds, image metadata, and a small gallery of experiments that can be reproduced from the command line.
That is where models like this start to feel less like a novelty and more like a utility.